Newest Post
Long Time Not talk here..... ^^
if you have times. c my costume design n vote me on dragon nest sea forum okk.. ^^b.. hehe... kimi tachi wa Gambaru zhe ^^
This part of my design there,,
if you have times. c my costume design n vote me on dragon nest sea forum okk.. ^^b.. hehe... kimi tachi wa Gambaru zhe ^^
This part of my design there,,
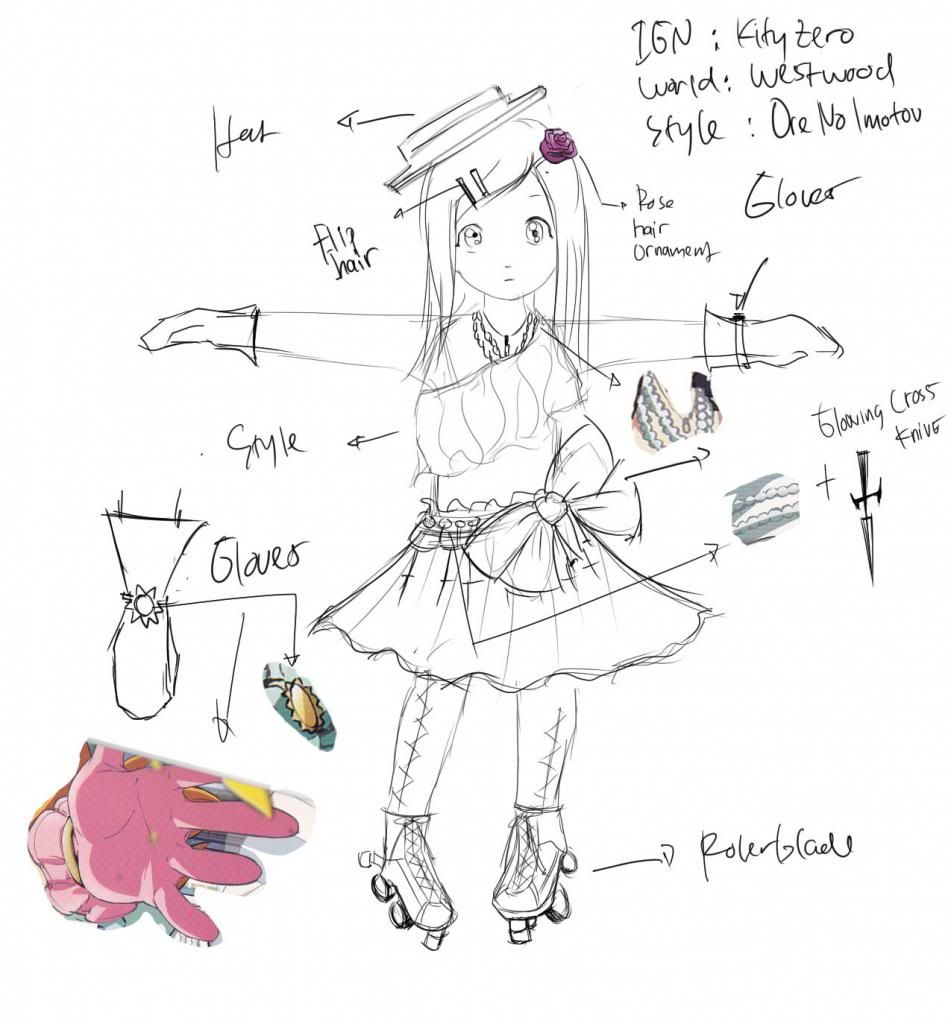 | |
| academic Imotou style > < |
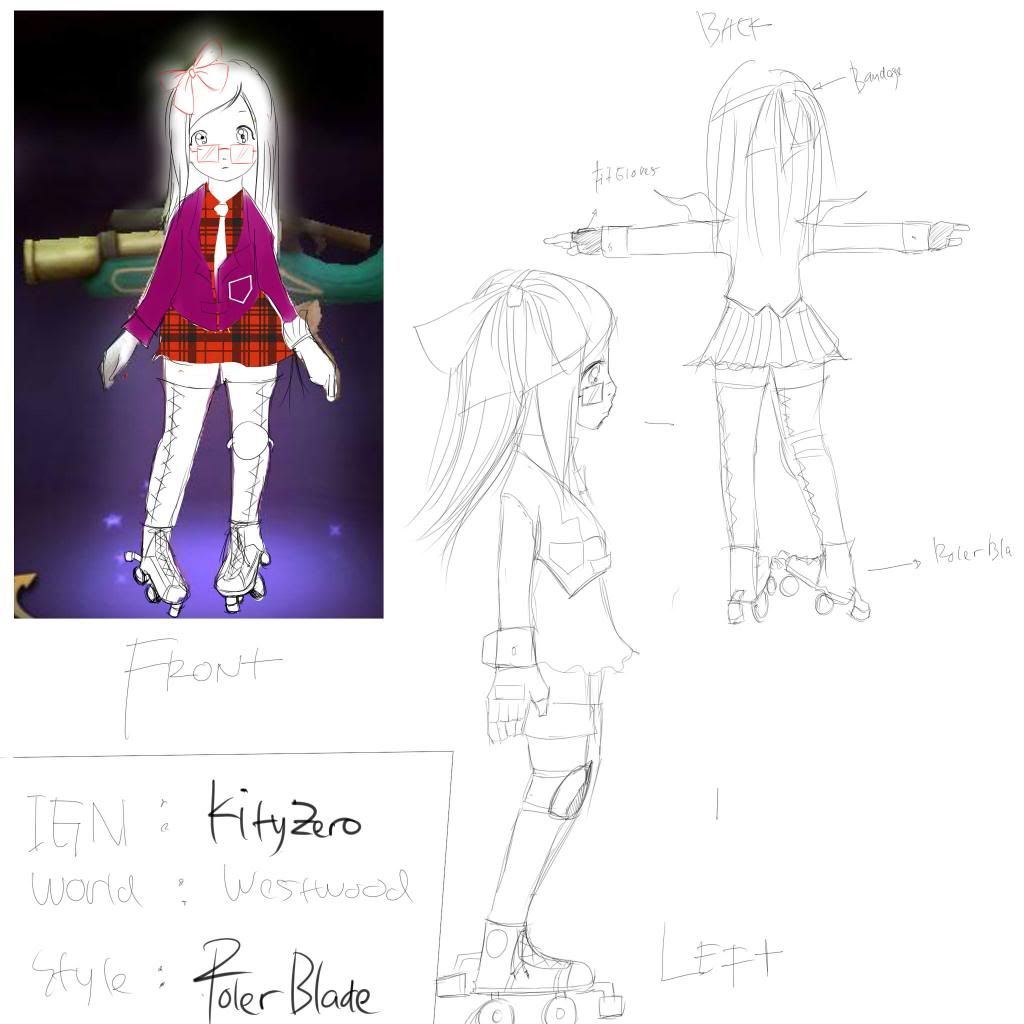 | |
| Academic School style |
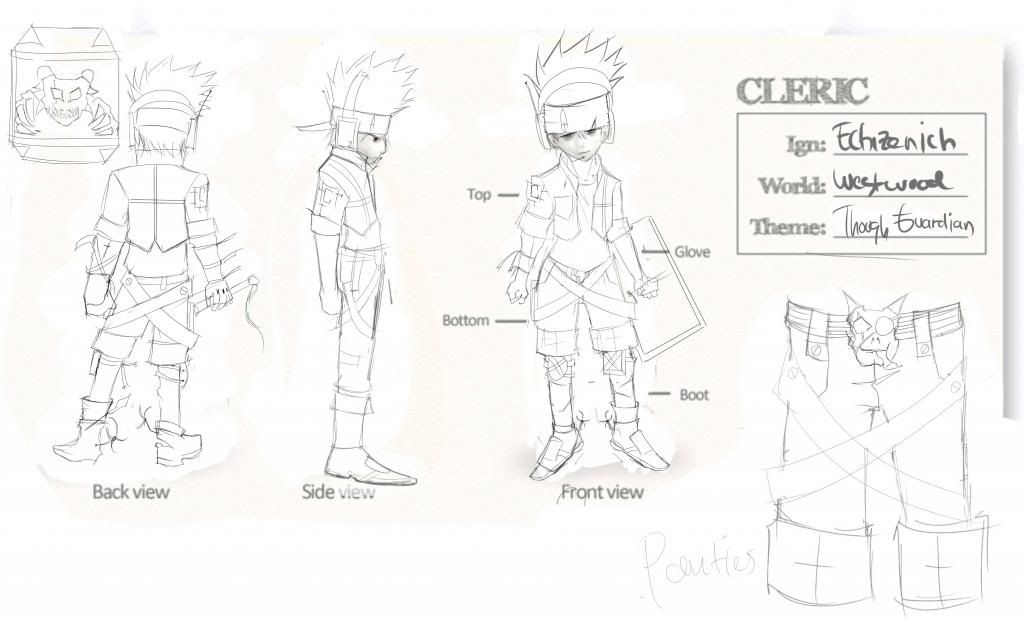 | |
| Cleric Team Leader style |
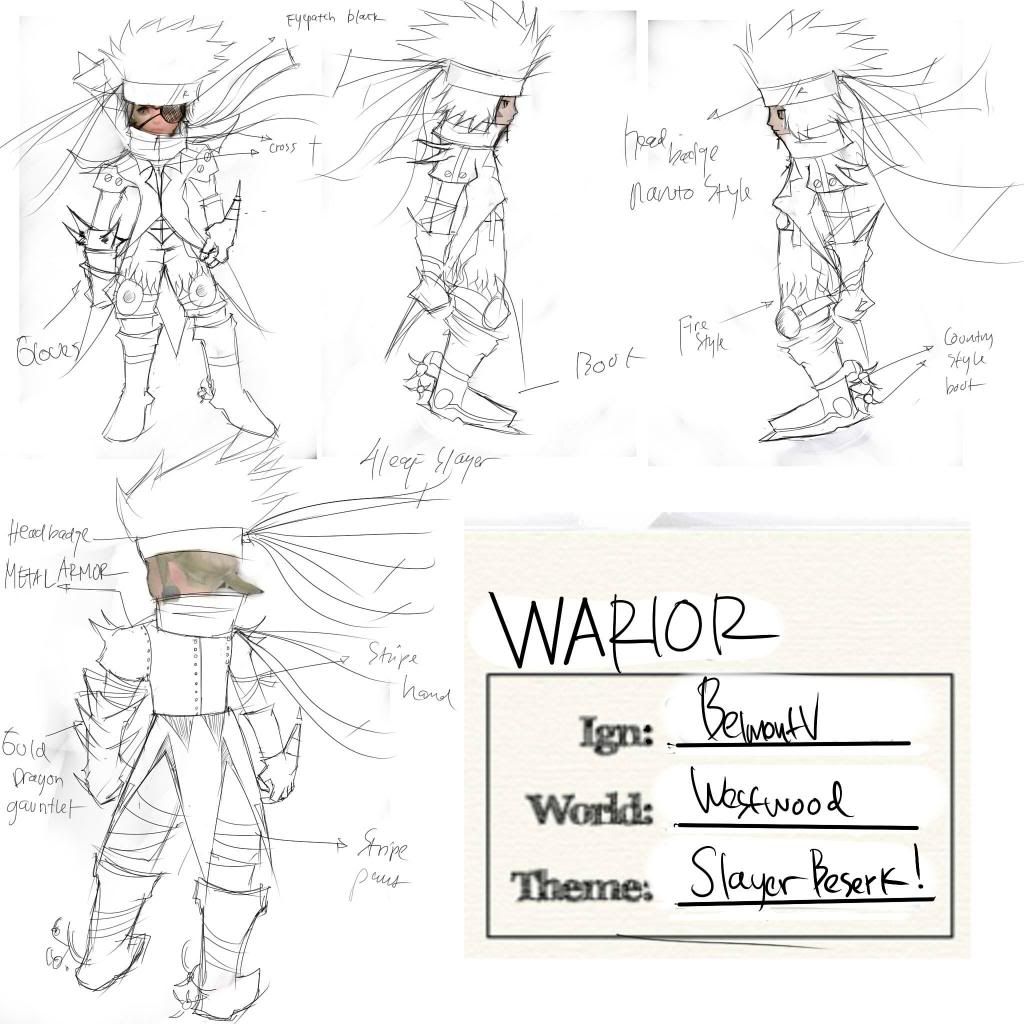 | |
| Warioir Naruto Style |
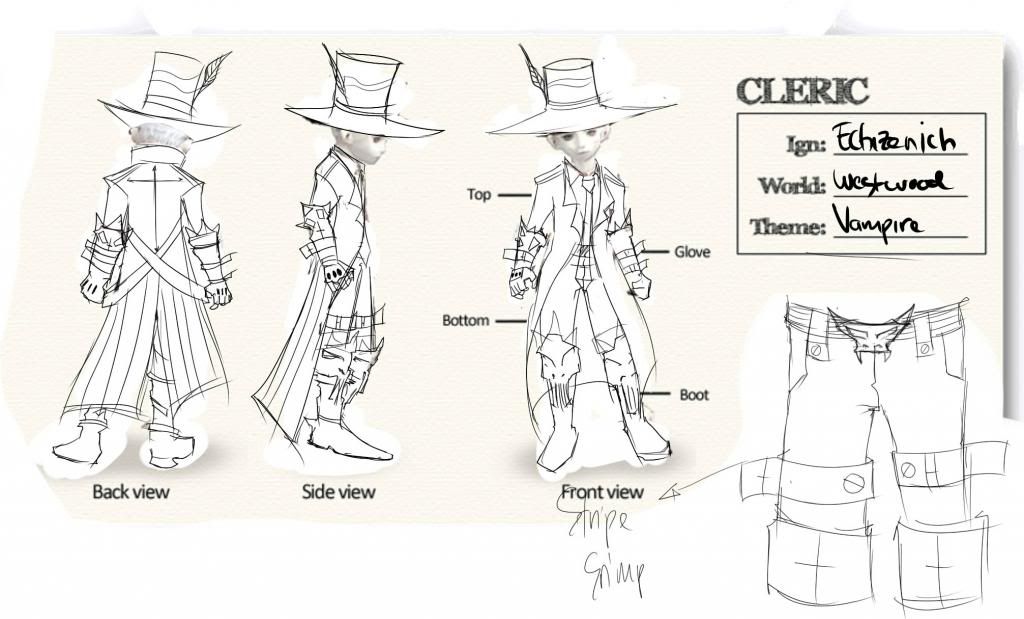 | |
| Cleric Vampire Style |
Tag :// Design
 |
| Texture Untuk Baju |
 | |
| Texture untuk Celana |
- Step 1 gunakan gambar sebelumnya, buat layer baru .
- Step 2 ubah seting layer ke multiply , dengan begitu kita dapat melihat background gambar sebelumnya.
- Step 3. paste satu atau lebih texture pada celana , kita dapat merubah bentuknya dengan menekan tombol ctrl + t dan merubahnya , memutarnya , membesarkanya dll, gabungan texture semuanya dan, hapus bagian tepi dari texture lalu gunakan oil water tool untuk membuat semua layer texture menjadi satu dengan sempurna.
- Sedikit tips jika bagian tepi terdapat warna hitam, bisa anda hapus dengan menggunakan oil water tool.. jangan terlalu banyak nanti terlihat sedikit aneh ^^
 |
| coloring pant |
 | ||||
| cloth with black white texture |
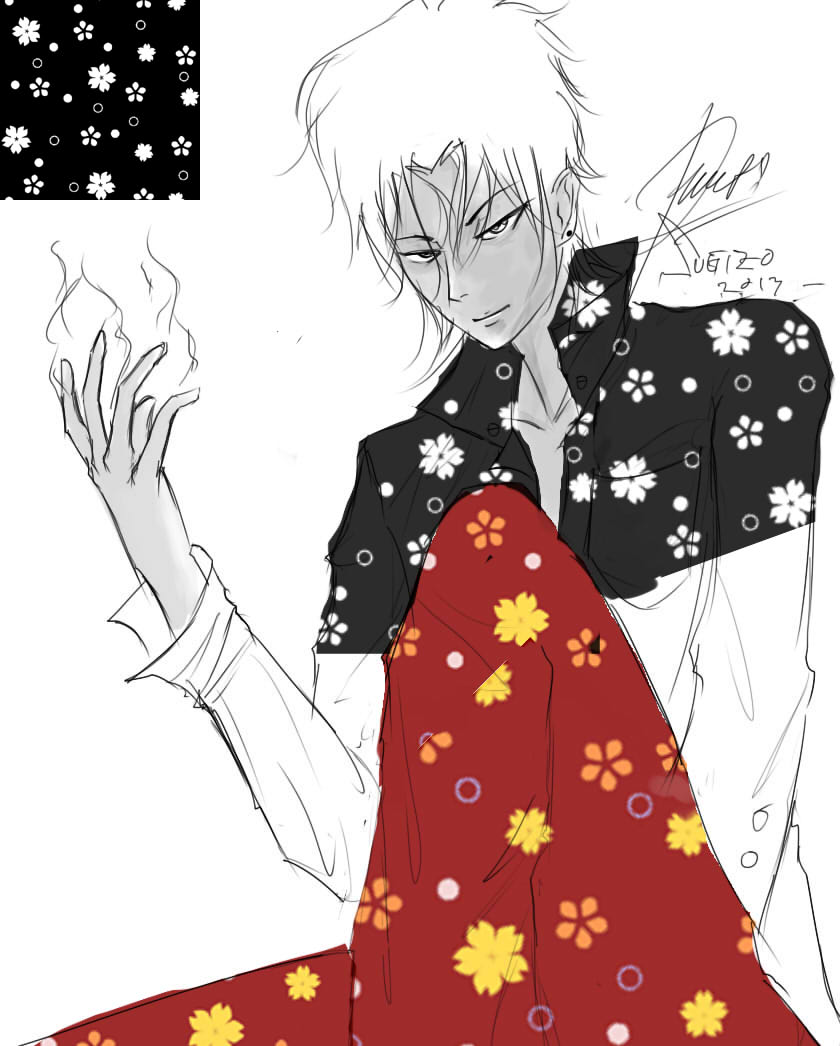
- Dalam mewarnai baju dengan texture hitam ini, hampir mirip dengan proses pewarnaan celana di atas. tapi dalam proses ini texture opasity nya di turunkan menjadi cukup 83% dan ubah seting layer menjadi multiply agar line art nya tetap bisa terlihat.

 | |
| erase it |
- Kemeja di atas di hapus perlahan. jika ingin menghapus secara vertikal atau horizontal cukup menekan shift + tekan E ( erase ) yg artinya mode penghapus. dan click ke arah tujuan. maka hasil garis / hapusan akan lurus. seting juga tingkat kekuatan penhapus dengan menekan tombol 1-9 dimana 1 artinya 10% mode 10% ini berguna jika kita ragu menghapus tepi dari texture yang akan kita pasang.
 |
| finish with no shading |

- Hasil akhir diatas menggunakan teknik shading sebelumnya dan teknik texture ini. proses ini banyak digunakan dalam pembuatan manga atau anime sekarang.
- Step shading di atas. :
- di setiap lipatan baju kemeja atau celana kita membuat layer baru. dan jika ingin agar bagian tepi lebih rapi kita bisa check list mode layer clip on.
- lalu marker tool di pilih. pilih warna lebih gelap. jika ingin membuat shading celana. tekan ctrl + click kanan untuk ambil sample color . di sana warnanya orange. jd pilih warna yang lebih gelap dari orange. misal. orange merah. lalu marker di setiap lipatan baju. baju terlihat memiliki bayangan. dan terkesan masuk ke dalam karena efek gelap.'
- untuk proses lagi satu kita membuat layer baru lalu buat mode addition untuk memberi kesan ada cahaya di luar dari lipatan baju kemeja atau celana. pilih warna yang relatif lebih terang dan warnai, proses baju kemeja dan celana sama, cuma perbedaan nya. warna dasar dan cahanyanya mengikuti warna dasarnya. !
- Untuk lebih lanjutnya mungkin kita lebih memfokuskan pewarnaan dalam software photoshop. namun saya kurang tertarik dengan photoshop yang memiliki batasan atau meminta kebutuhan perangkat keras yang relatif kencang dan cepat, mungkin untuk lancar pewarnaan kita membutuhkan core i5 minimum . :D dan cintiq wacom yang harganya masih sangat mahal :D. GBU ^^
|
| texture for pant |
| |
| texture for cloth |
- step 1 . use our line art's
- step 2 custom layer with multiply with this we can see the background layer.
- step 3. resize and group the texture, and erase the texture , use oil water tool to makes all textures layer blended.
|
| coloring pant |
- if you want makes shadow, use darken color , on this pant we can use dark orange layer color.
| ||||
| cloth with black white texture |
- makes new layer and paste the texture on it. use multiply layer properties, and dunt forget to erase litle bit the textures , trough, reduce opasity to 83% to makes the texture look not to dark. its litle grey.
- put on the diferent layer first , resize it, erase it.. and blend it using tool oil and water. we need minumum maybe 2 or 5 flower textures to makes all cloth fill complete ,
| |
| erase it |
|
| finish with no shading |
- With Previously tutorial and this tutorial tips. shading makes cloth look litle more realistic.
Tag :// tutorials
 |
| layer 1 |
 |
| layer 2 |
 | |
| layer 3 |
 |
| layer 4 |
 |
| layer 5 |
 |
| layer 6 |
 |
| layer 7 |
 |
| layer 8 |
 |
| layer finish |
 |
| layer 9 |
- layer 1 : We can use selection tool . to select what area we want to chose , makes new layer and select brush tool . select grey collor and brush it. change the layer properties with multiply
- layer 2 : same but activate layer clip by check it first. chose grey color and select darken from grey before , or use brighnest tool to makes color more darken. n brush it again.change the layer properties with multiply
- layer 3 :coloring the cloth with red color. im using 2 layer red color and merge it become one.its look darken, red.change the layer properties with multiply
- layer 4 : coloring the cloth with masking tool by check the layer clip and coloring it with darken red color to makes shadow shading. on position same with out line art and dunt forget change the layer properties with multiply
- layer 5 : makes cloth look shiny with red color, dont forget to change layer properties with addition.
- layer 6 : same with cloth. but diferent color only.
- layer 7 makes shading on pant by using selection tool area. and put darken color again on it.
- layer 8 : coloring it with yellow
- layer 9 : addition layer properties and coloring it hair with glowing yellow and
- layer 10 : chose grey collor and makes shiny on nose and check tyki mikk. look glowing litle bit . ^^ .. tara...
- if wanna makes background maybe on photoshop. with many option of brush tool there. its quite cool i think :) ,, thx ^^
Tag :// tutorials
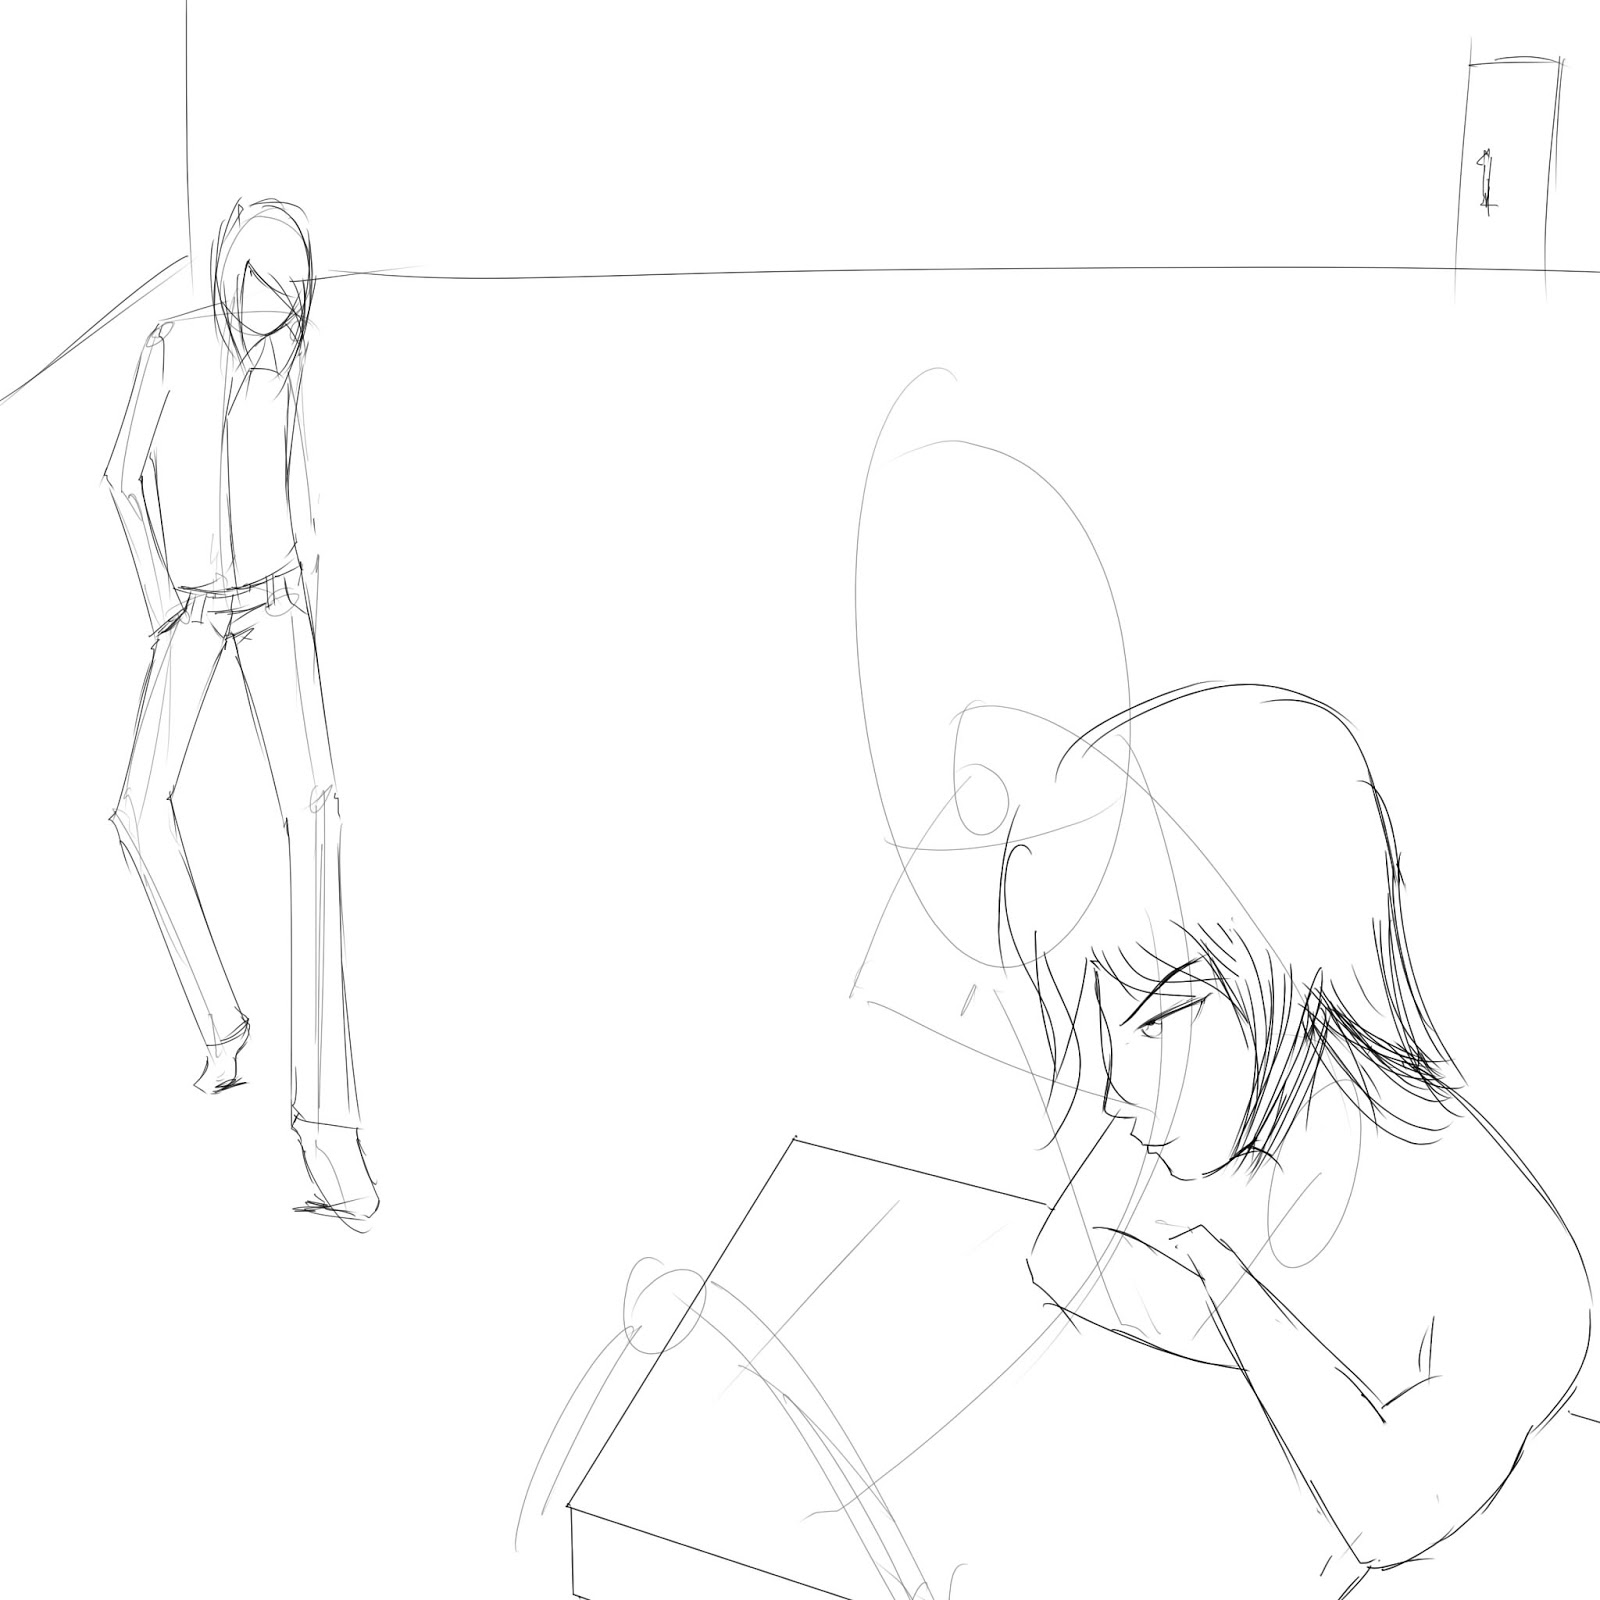
When we want to draw scene on manga, we need exacly to know where the point of view angle camera position is, usualy main character have more detail than others, Coz when we build character development , we must mastering expresion , deformation, angle camera position, have many reference to makes ( cloth , armor ) and anythink else to makes our manga, eye catching. its still hard for me.. xD... but keep works ^^
 |
| main have detail and near of camera |
Look On the uper pictures the main character was sit down on the chair, and the second was walk behind. i makes the concept first both of that character. but if you can, we can draw trough to the paper. :)
 |
| makes wall on the behind scene |
The Second Character Was walking, dont makes to much detail on it, its reduce spend times when we draw alot of slide manga.

Get Near Of The Camera biger, far away Smaler and not have many detail. on my sampe the position of the camera was on the center. use our imagination XD, and dunt forget always practice.. ^^
 |
| concept first |
 |
| half of final finish^^ |
Tag :// tutorials
 |
| Cero Idiot Neko xD |
 |
| Cero using cool hat XD |
- First I draw. the 1 eyes first. Use Pencil tool.. dunt forget to makes concept first . oval lines.
- After that select selection tool lasso tool on our eyes.. ctrl + c and ctrl + v , tara.. another eyes come on different layer, select layer -> hirzontal flip. on new layer eyes. rotate and deform cat eyes until look nice. move position , resize or anything else to makes our cat look yummy :3
- Then makes ear . both.. added some hair with pencil tool. ima makes 2 ponny on my cat xD~ , hand also if we're lazzy makes just copy paste n reform it.. we got another hand :3 with same proportion, it such like miroring our drawing object. happy drawing. ^^b
Tag :// tutorials
Description: Ending theme
Lyrics by Shin
Music by Reno
Performed by ViViD
kanji hiragana
The Japanese word "mugen", when not written in kanji (Chinese characters), can mean either "infinity" or "dreams".
Lyrics by Shin
Music by Reno
Performed by ViViD
kanji hiragana
| Original / Romaji Lyrics | |
|---|---|
| "Are you ready?" | |
| Do not fear "ima" MUGEN NO KANATA ni mienai mono o miyou to shite nanzen'oku no KIRAMEKI no shita de yume o sagasu kimi o mitsuketa | |
| I do not look alone Somebody cries world somewhere Teach a meaning to live | |
| sadamerareta suushiki tte soko ni nan no imi ga aru no darou chiribamerareta kimi wa tada kagayakinagara sora ni mau kako mo mirai mo nai mama ni kotae wa sora no mukougawa | |
| Do not fear "yume" MUGEN NO KANATA ni shinjitsu mo uso mo mienai mama de nanzen'oku no KIRAMEKI no shita de kaze ni yureru hana wa yurameku | |
| garasudama no naka hirogaru ∞(mugen) no sekai imi no nai koto takusan shitte otona ni natta ki ga shite ita chiribamerareta kimi wa tada kagayakinagara sora ni mau kako mo mirai mo nai mama ni kotae wa sora no mukougawa | |
| Do not fear "yume" MUGEN NO KANATA de hikari ga subete o tsutsumikonda nanzen'oku no KIRAMEKI no naka de kotae no nai kotae sagashita | |
| Do not fear "yume" mugen no kanata ni shinjitsu mo uso mo mienai mama de nanzen'oku no KIRAMEKI no shita de kaze ni yureru hana wa yurameku |
| English Translation |
|---|
| "Are you ready?" |
| Do not fear "the present." Trying to discern the invisible beyond the infinity/dreams, I have found you, who have been searching for a dream under the billions of glitters. |
| I do not look alone Somebody cries world somewhere Teach a meaning to live |
| Just what meaning is there in an established mathematical formula? Inlaid into the sky, you simply dance along in your dazzling radiance, without any past or future. The answer is on the other side of that sky. |
| Do not fear "dreams." Without seeing either truths or lies beyond the infinity/dreams, the flowers sway to the winds under the billions of glitters. |
| A world of ∞(infinity) expands within the glass ball. Having studied so many meaningless concepts, I thought I had become an adult. Inlaid into the sky, you simply dance along in your dazzling radiance, without any past or future. The answer is on the other side of that sky. |
| Do not fear "dreams." Light has enveloped everything beyond the infinity/dreams. I searched for an answerless answer within the billions of glitters. |
| Do not fear "dreams." Without seeing either truths or lies beyond the dreams, the flowers sway to the winds under the billions of glitters. |
The Japanese word "mugen", when not written in kanji (Chinese characters), can mean either "infinity" or "dreams".
Tag :// lyrics


